
Side Note: I am not a professional “stairlift engineer” – I am just tired of getting ripped off by them and this industry as a whole. Because of them and their gouging prices or complete ignorance, I was forced to learn about this chairlift so that I could repair it for my mom who suffers from a crippling disease.
I created the information below to be of help to you without a manual. However, I found the service manual online if you need it. A special thank you to the person that posted the manuals online. You can find it here. There’s also a newer version of the Acorn chairlift and the programming manual for that can be found here.
Acorn 180 Chairlift Displays a “0”
I’m about finished installing an Acorn 180. Whenever I turn it on, even in programming mode, it clicks once fairly loud and then displays a zero with a flashing dot to the lower right. Anybody have an idea what the problem could be? I just replaced the batteries with fresh/new batteries.
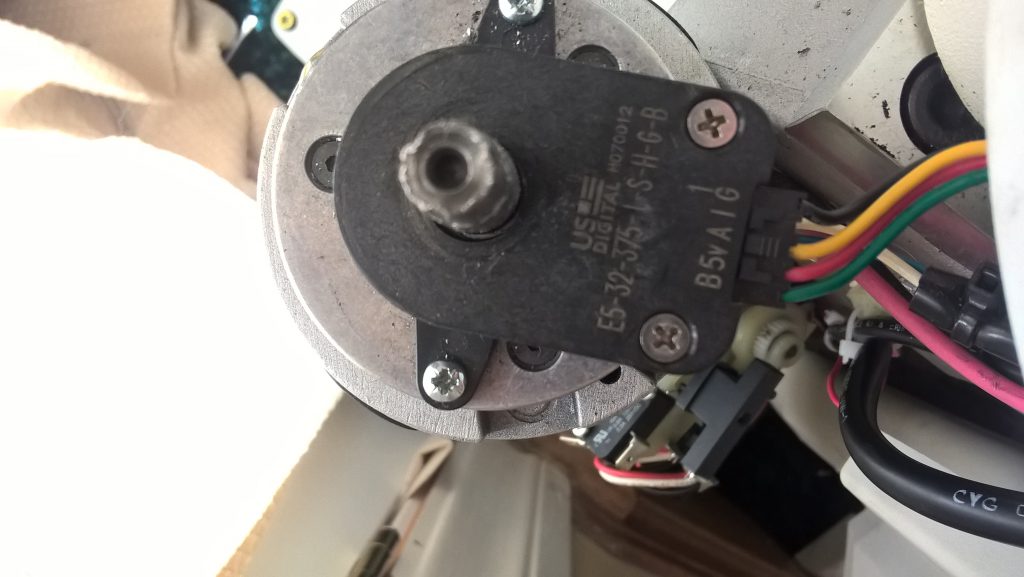
Answer: The zero code or “O” code means that there is a problem with the overspeed governor. The overspeed governor is on the back of the stairlift carriage and can be accessed by removing the covers. It sits in between the drive motor and the leveling motor. The purpose of the OSG is to stop the stairlift in the event that the stairlift is going to fast. The overspeed governor is like a mouse trap that needs to be set and can easily be tripped causing this error code. You can manually reset it by pressing a black tab at the back of the lift and making sure the plunger switch is held open by the white plastic tab on the plastic ring.
===================
Replacing the Batteries on an Acorn 180 or Bison 80 Stairlift
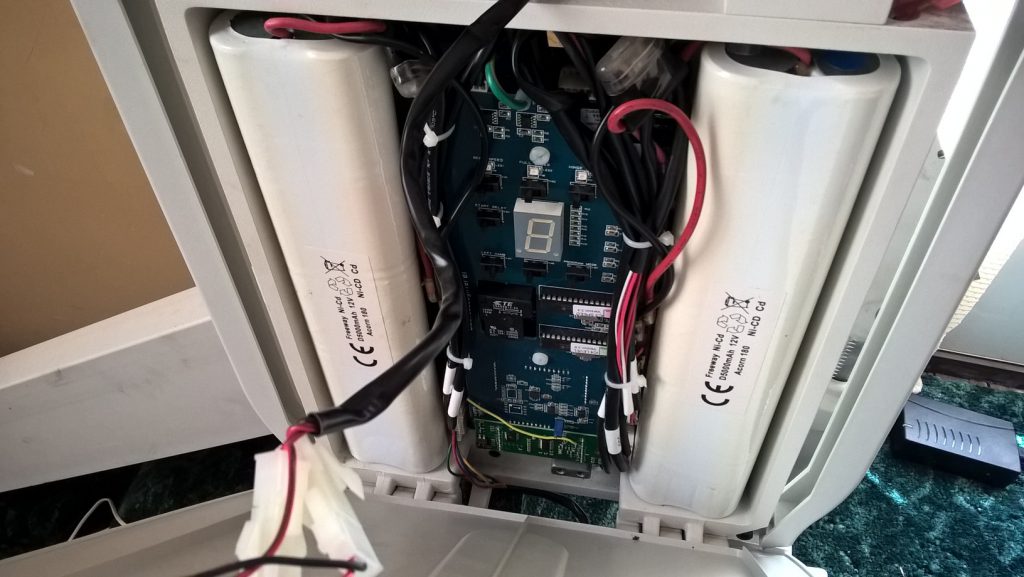
Remove the front cover by unscrewing the two philips screws and removing them. Find the two long batteries on either side of the circuit board. Take a picture of them so that you will know how to reconnect the wires. Undo the positive wire and then the negative wire on each of the batteries one at a time. Pull the batteries out slowly as they are attached by velcro. Note the name and number on the batteries and do a search for them online. You should be able to find replacement batteries at around half of the price of the manufacturer. Reinstall the batteries the opposite way you to them out. You will notice that the display gives an odd symbol and that the chairlift is inoperable. This is easy to fix. Find the “program” toggle switch on the circuit board and switch it to “on”. This will allow you to move the chairlift. Move it up to the top charging terminal and stop a couple of inches before you reach it. Unplug the positive battery cable on the right battery. Plug it back in. Now move the stairlift onto the charging terminal and then activate the “final limit switch” on the bottom back of the chairlift while the chairlift is moving on the charging station. The final limit switch is a white plastic switch that eventually hits the silver metal tabs on the railing. Now move the chairlift down and off of the charging station until you have reached your starting point. Toggle the program switch to “off” and you should see a number “5” which means that your chairlift is now ready for operation. Make sure to park your chairlift back onto the charging station so that the new batteries can charge up fully. You have now successfully replaced the batteries and reprogrammed the chair to know where the top charging station is located.
On a side note, before you buy new batteries, the Acorn 180 is designed so that it will not charge the batteries if they are completely drained. You must remove the batteries and charge them with a battery charger so that they can first power up the Acorn 180 and then the system will allow the batteries to charge fully. Many people will buy new batteries when they only need to charge the old batteries with a battery charger first.
====================
Programming the Remotes
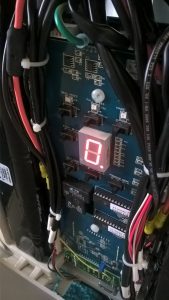
Your remotes need to be on the same radio frequency channel as the stairlift. Look at the remote you have and open up the battery area. You should see two wires other than the battery wires. One green and one yellow. If they are both intact and not cut, then the remote is set for channel 1. If the green one is cut but the yellow one is not cut, then the remote is set for channel 2. If the yellow one is cut and the green one is not cut, then the remote is set for channel 3. If they are both cut then the remote is set for channel 4. Now you need to open up the front compartment on your stairlift and look at the transceiver board which is the green board attached to the bottom of the blue circuit board. Look to the left and you will see a small box with two switches. For channel one, make sure they are both switched to “On”. For channel two, make sure switch 1 is “Off” and switch two is “On”. For channel three, make sure that switch 1 is “On” and switch 2 is “Off”. For channel 4, make sure both switches are in the “Off” position.
Tip: If you have one remote that works, make sure the green and yellow wires are the same in the remote that doesn’t work and that you have fresh batteries.
====================
Assembly and Disassembly of the Acorn 180 Railing
The railing of the Acorn 180 seems like it would assemble and disassemble easily enough but when you start the railing pieces are very difficult to pull apart or put together. This is because there is a set screw on each railing piece. Notice on the rail that there is a bolt that you must screw/unscrew and next to the bolt is a hole in the railing. It is difficult to see, but inside this hole is a set screw that requires a hex to loosen. Once that set screw is loosened, you can easily slide the pieces together or apart.
====================
Programing the Acorn 180 or Bison 80
If you are reassembling an Acorn 180 or have replaced the batteries, you must reprogram the stairlift. Sometimes the stairlift only needs to know where the top of the rails are. In that case you just set the “datum” point and the stairlift will remember the old program from there. Other times you must reprogram the entire lift sequence.
Programming just the “Datum” point: Find the “program” toggle switch on the circuit board and switch it to “on”. This will allow you to move the chairlift. Move it up to the top charging terminal and stop a couple of inches before you reach it. Unplug the positive battery cable on the right battery. Plug it back in. Now move the stairlift onto the charging terminal and then activate the “final limit switch” on the bottom back of the chairlift while the chairlift is moving on the charging station. The final limit switch is a white plastic switch that eventually hits the silver metal tabs on the railing. Now move the chairlift down and off of the charging station until you have reached your starting point. Toggle the program switch to “off” and you should see a number “5” which means that your chairlift is now ready for operation. Make sure to park your chairlift back onto the charging station so that the new batteries can charge up fully. You have now successfully replaced the batteries and reprogrammed the chair to know where the top charging station is located.
Reprogramming the entire sequence: Find the “program” toggle switch on the circuit board and switch it to “on”. This will allow you to move the chairlift. Move it up to the top charging terminal and stop a couple of inches before you reach it. Unplug the positive battery cable on the right battery. Plug it back in. Now move the stairlift onto the charging terminal and then activate the “final limit switch” on the bottom back of the chairlift while the chairlift is moving on the charging station. The final limit switch is a white plastic switch that eventually hits the silver metal tabs on the railing. Now move the chairlift down and off of the charging station until you have reached your starting point. Now toggle the bend speed switch to “on” and start down the railing. If you come to a long straight section you can toggle the “speed” switch to “on” and then toggle it to “off” when you reach a bend or stopping point (while still leaving the bend speed toggle to “on” – you will have two switches on at this point). Make sure to leave plenty of room to slow the chair down. You do not want to go fast on bends because the chair must have time to adjust for leveling. Once you reach the bottom terminal, make sure you are in bend speed. As the chair touches the bottom terminal activate the final limit switch and then move the chair up the railing off of the terminal. Toggle the program switch to “off” and you should see a number “5” which means that your chairlift is now ready for operation. You have successfully fully programmed the chair.
====================
Common Error Codes for the Acorn 180 or Bison 80 Stairlift

5 – Ready for operation
4 – Stairlift unlevel – turn the shaft of the leveling motor until the stairlift is level
2 – Batteries not charged
– – (Dash) Not enough power – batteries need charging
| | – Something is hitting the bumpers or the wire from the bumper switch to the circuit board is loose
0 – The over speed governer is having a problem or needs to be reset
= – The chair needs to find the “datum” point or be programmed
Smiley Face – the chair is in programming mode
The chair is beeping – It is on, not moving, and not on a charging terminal
====================
Leveling the Acorn 180 or Bison 80
The pentionemeter levels the stairlift and it should come level from the factory. However, there may be a time that you need to adjust it. Notice the small blue box at the bottom of the circuit on the picture below. Now notice the tiny copper screw on the bottom left of the blue box. This screw will adjust the level. You must have the chair in program mode and moving in order to notice the level of the machine. Adjust it slightly as the machine moves and stop when the carriage is level according to a leveling tool. Note: if the chair is tilting heavily at random times, you may have an encoder problem and not a pentionemeter problem.
====================
Tilting problem with the Acorn 180 or Bison 80
I have an acorn 180 that I am working on. I have programmed it multiple times but when it comes out of programming mode it wants to tilt really fast until a number 4 displays. The number 4 means it is out of level and so I manually level it. I can put it in programming mode again and it will operate and level itself but as soon as I put it in run mode it will tilt. I have adjusted the pentionemeter to set it level to no avail. Any suggestions? Could it be a bad encoder for the leveling motor? If so, why does it work in programming mode? Could it be that my reprogramming of the lift isn’t saving?
After a lot of research and trial and error, the problem was the encoder for the drive motor. The encoder counts the number of times the shaft rotates giving the stairlift computer the exact location of the chair on the rail. This allows the computer to know how to tilt the chair. Since the drive encoder was broken, the computer was confused and would tilt it randomly. By contacting the manufacturer of the encoder, US Digital, I was able to buy it for around $85 USD. Incidentally, the part for the leveling motor and the drive motor are identical. The part number for my particular Acorn 180 model was E5-32-375-I-S-H-G-B. It was fairly easy to replace. Make sure to take a few pictures when uninstalling the old encoder so you will have something to reference when installing the new one. When replacing, make sure to use the spacer tool when pushing down the metal/plastic optical ring so that it has the correct amount of spacing. Also, use a long ratchet socket to evenly tap down the ring to the correct position. Once I replaced the encoder, I was able to reprogram the stairlift and it worked great!
=============================
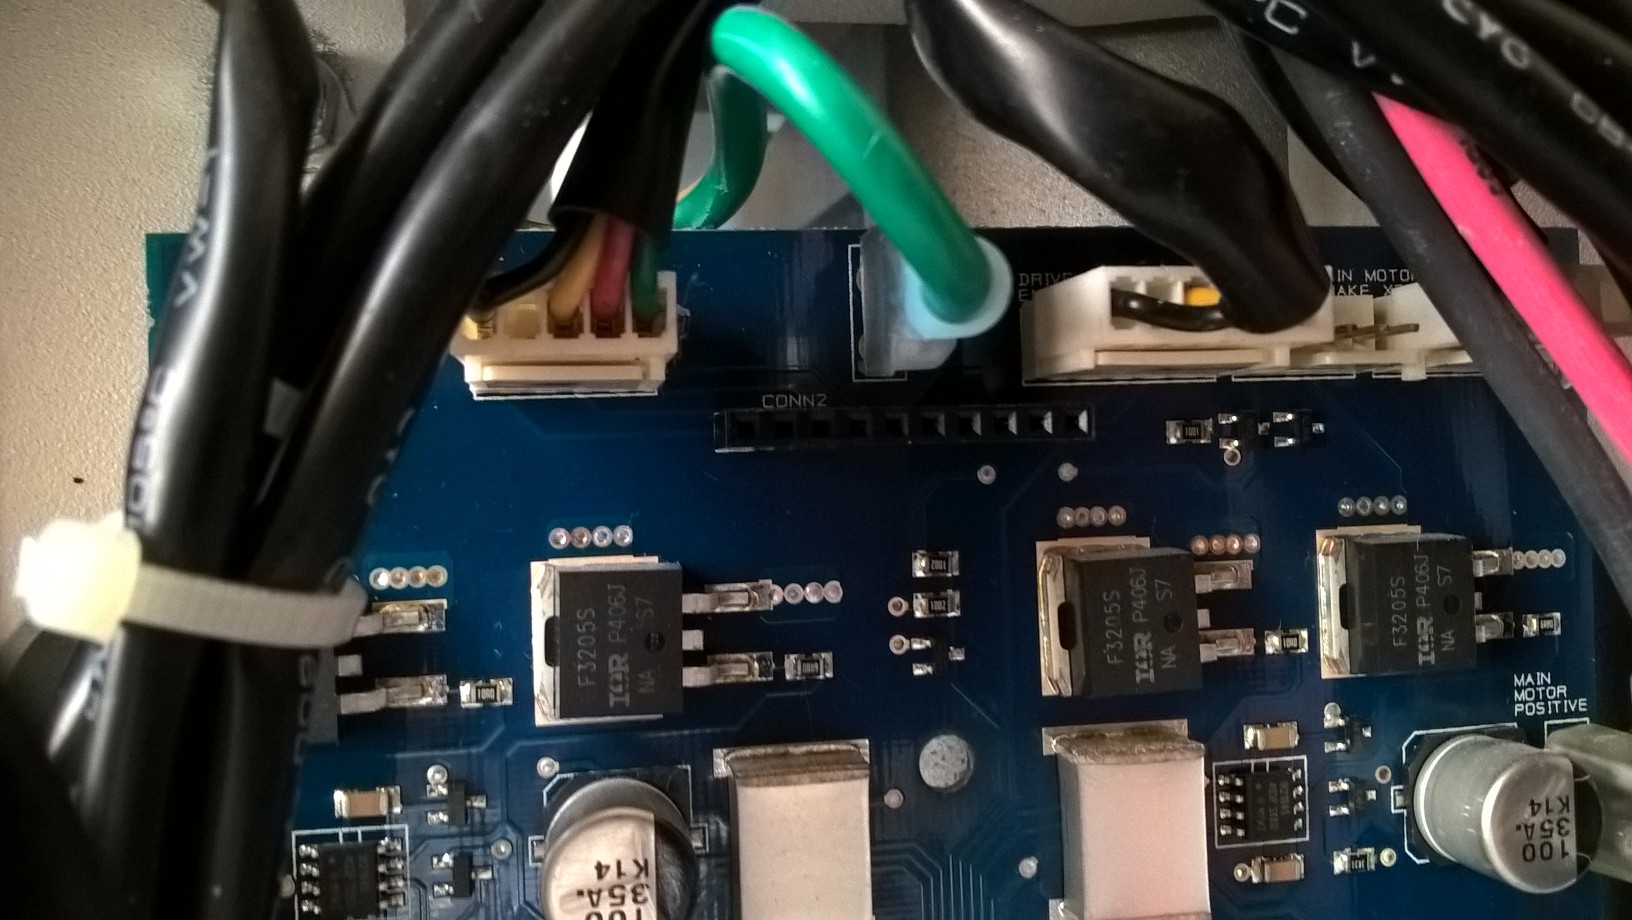
Pictures of the Acorn 180 or Bison 80
Back circuit board
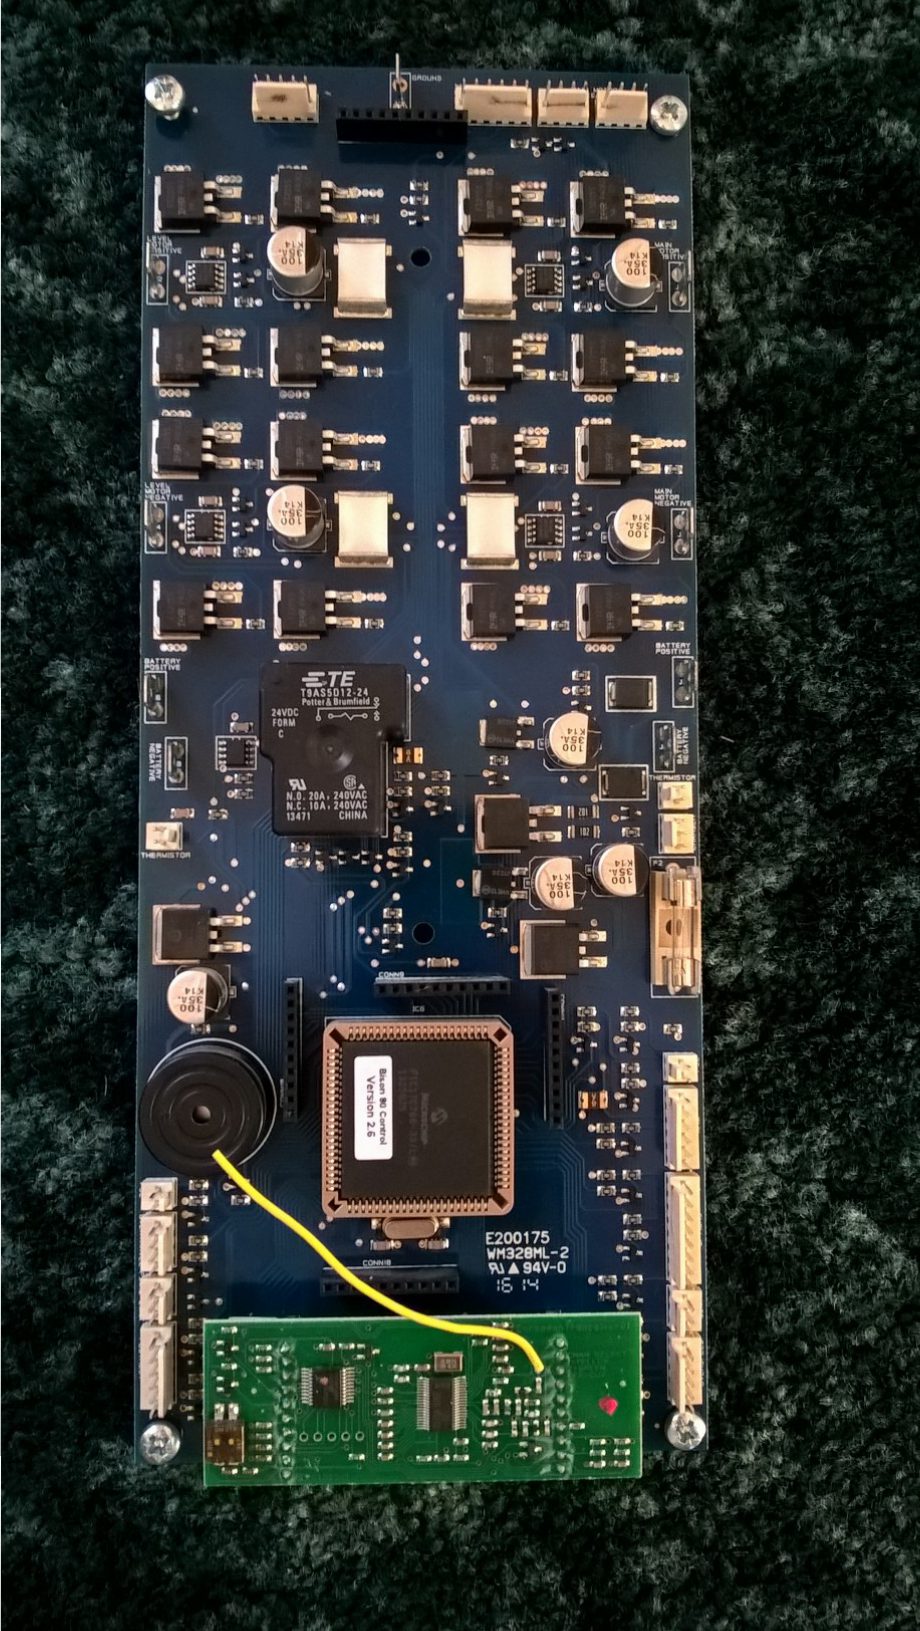
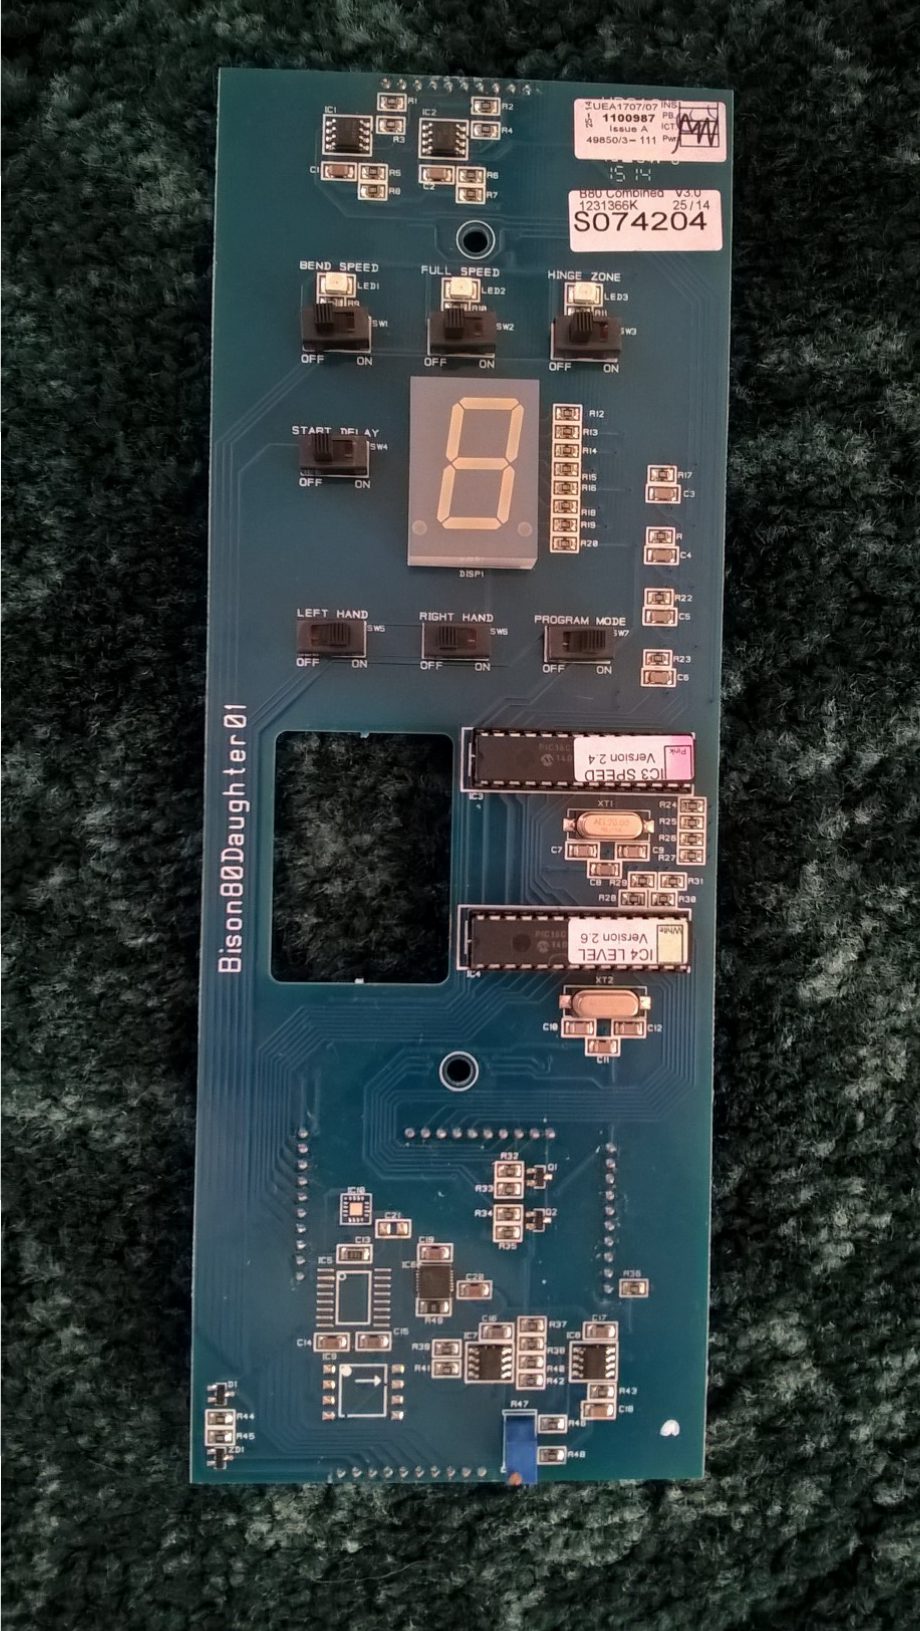
Front Circuit Board
Board Pic with wires 1
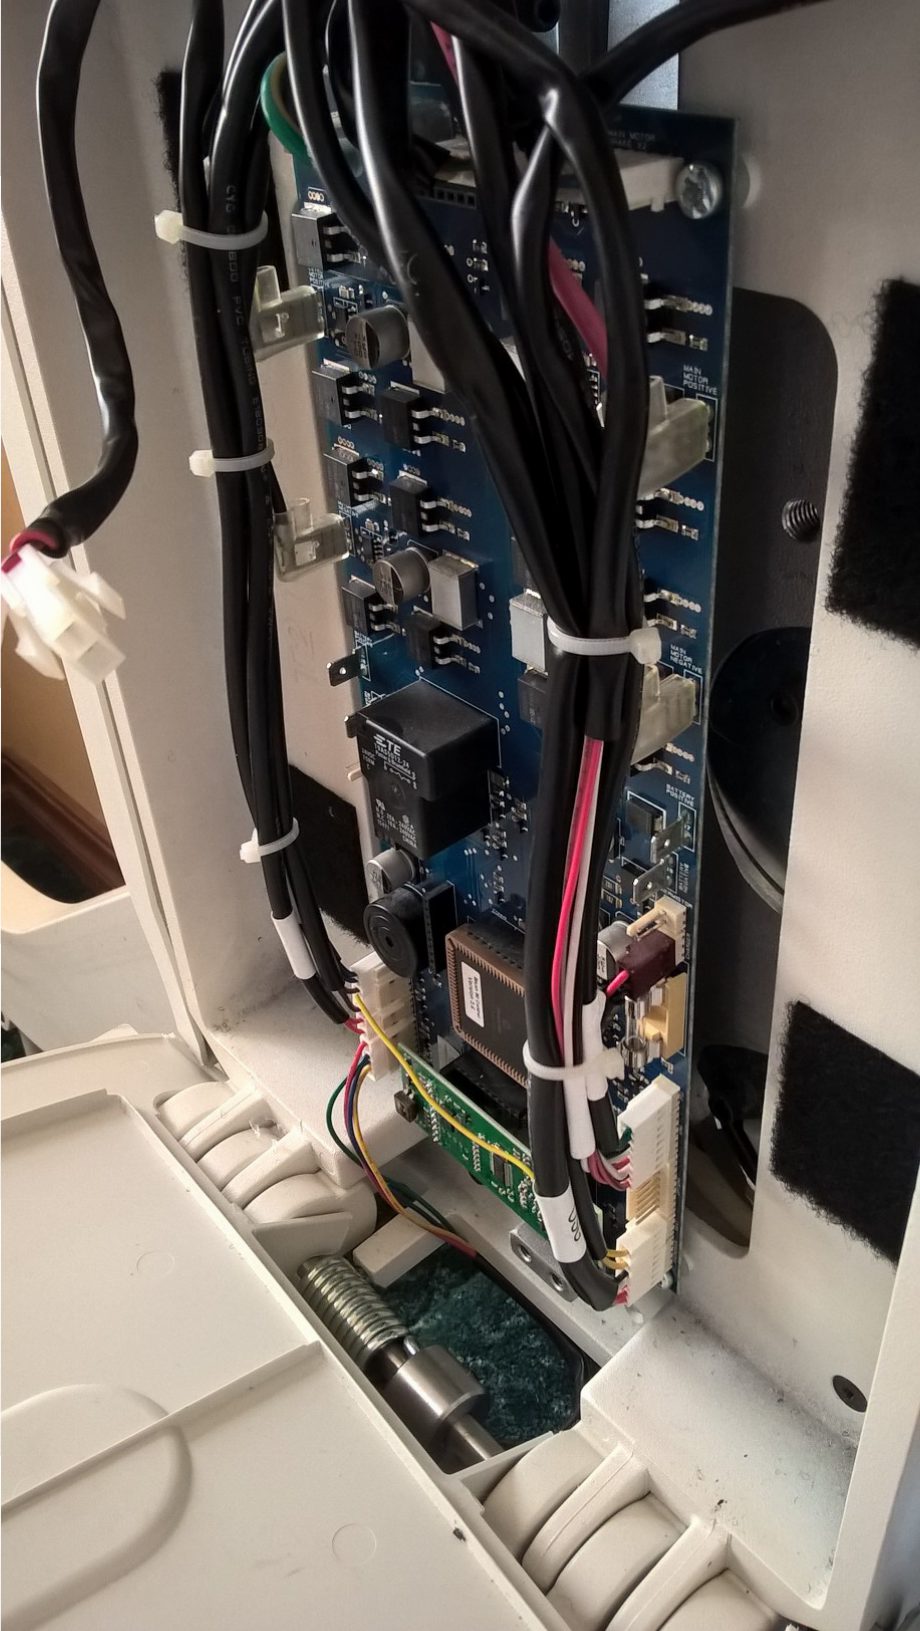
Board Pic with wires 2
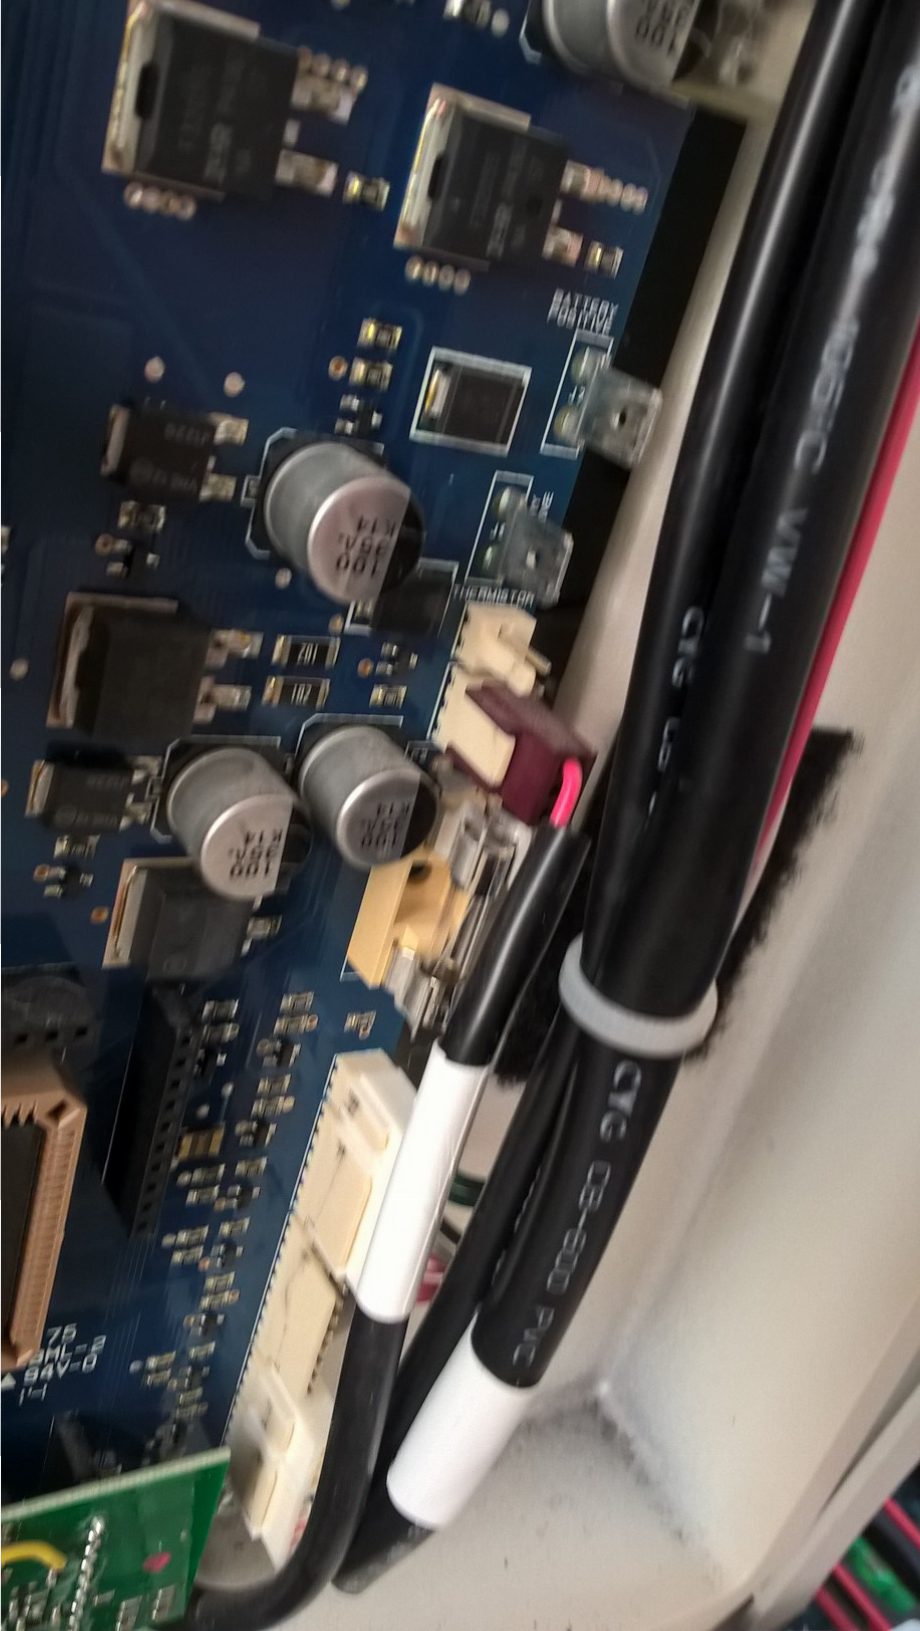
Board Pic with Wires 3
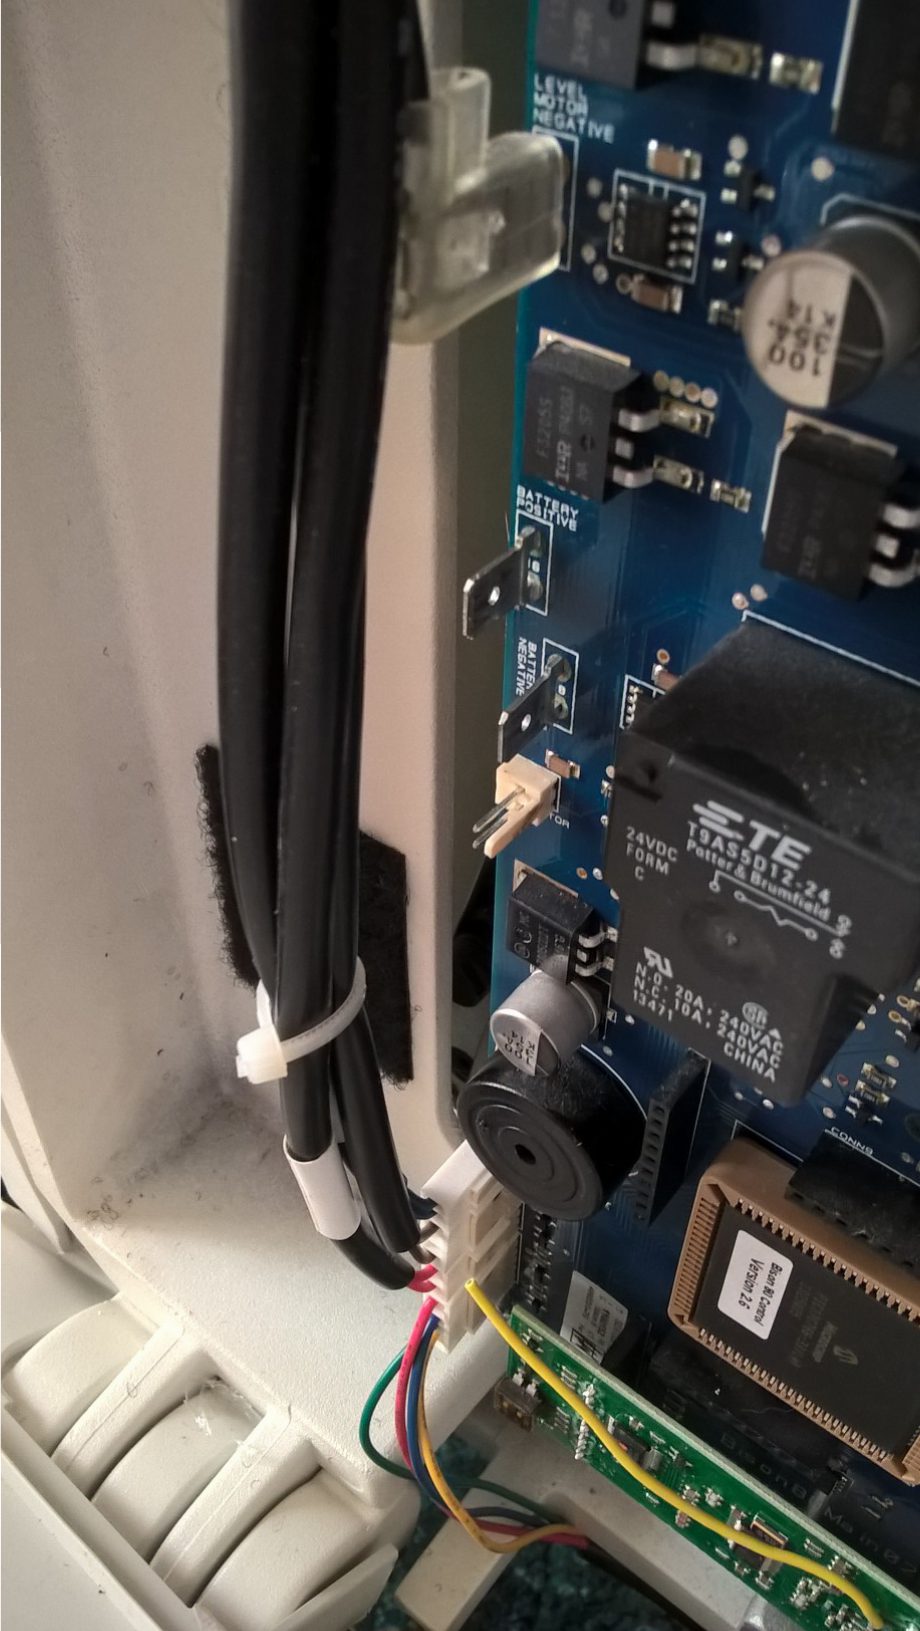
Board Pic with wires 4
Empty Carriage Unit
* These stairlifts are expensive and costly to repair. You agree that by using the information on this page that you are absorbing all liability and risks associated with working on a stairlift. Dealing with electricity and moving parts could subject you to injury or even death. These stairlifts could easily be damaged beyond repair. You agree to assume all financial, health, and other risks. You agree to not hold us liable. You also agree to limit any damages to $1 and that the court jurisdiction would be Oklahoma County, OK. USA. You also fully understand that this page is a documentation of the steps that we have taken to problem solve our Acorn 180 stairlift and is in no way an instruction manual for you to follow. This page will allow us to remember what I did in order to solve problems to my Acorn 180 in the future.
If you have found this page helpful, please go to www.rolltochurch.com to donate to Roll To Church – which is a bus ministry that my wife and I started that takes children to church to learn about Jesus Christ.
Also, I created software that will allow you to control a Tivo (DVR system) with only your eyes. This is useful for people suffering from ALS and other diseases. You can find the free download here.